
Are you looking for a creative and affordable way to refresh your home? Look no further than these 5 Easy DIY Furniture Upcycling for Beginners. Furniture upcycling is an exciting way to breathe new life into old pieces, making them feel new without the hefty price tag. Whether you’re an experienced DIYer or a complete beginner, upcycling offers the perfect blend of creativity, cost-effectiveness, and personal satisfaction.
It is a fun and manageable project that doesn’t require expert skills or expensive materials. So, let’s dive into some simple yet gratifying DIY furniture upcycling projects that will transform your home and show you that with just a little time and effort, anyone can do it.
Why Furniture Upcycling is the Perfect DIY Project
Upcycling furniture has become one of the most popular trends in the DIY world, and for good reason! Here’s why it’s the perfect project, especially if you’re just getting started with DIY:
- Cost-effective: Easy DIY Furniture Upcycling for Beginners is ideal if you’re on a budget. Instead of buying new furniture, you can repurpose what you already own or find affordable pieces to upcycle.
- Eco-friendly: By upcycling, you’re not only saving money but also contributing to reducing waste. Rather than sending old furniture to the landfill, you can give it a second life.
- Creative outlet: Whether you’re repurposing a vintage dresser or repainting a coffee table, upcycling lets you unleash your creativity. It’s fun, rewarding, and adds a personal touch to your space.
- Accessible for all skill levels: You don’t need advanced DIY skills to get started. Simple techniques, like sanding and painting, can make a huge difference.
By starting with small, easy projects, you can gradually build your confidence and skills.
Essential Tools and Materials for Easy Furniture Upcycling
One of the great things about Easy DIY Furniture Upcycling for Beginners is that you don’t need to invest in expensive tools. Most projects can be completed with just a few basics. Here’s a list of essential tools and materials you’ll need to get started:
Tools:
- Screwdrivers: Handy for disassembling furniture or tightening loose joints.
- Paintbrushes: A variety of brush sizes will help you get into corners and apply even coats.
- Sanding block or electric sander: Prepping the surface is key to a smooth finish.
- Staple gun: Useful for reupholstering chairs or adding fabric elements to your project.
- Measuring tape: Ensures precise measurements when cutting or rearranging parts.
Materials:
- Chalk paint: A beginner-friendly paint that doesn’t require priming or sanding.
- Wood varnish: Helps protect your finished product and gives it a polished look.
- New hardware: Drawer pulls, handles, and knobs can instantly upgrade old furniture.
- Stencils: Great for adding patterns and designs to surfaces for a custom touch.
By investing in these essentials, you’ll be prepared for most basic upcycling projects.
Five Easy and Gratifying DIY Furniture Upcycling Projects
Ready to get started? Here are five easy furniture upcycling projects, perfect for beginners. These projects are budget-friendly and satisfying, giving your space a fresh, new look with minimal effort.
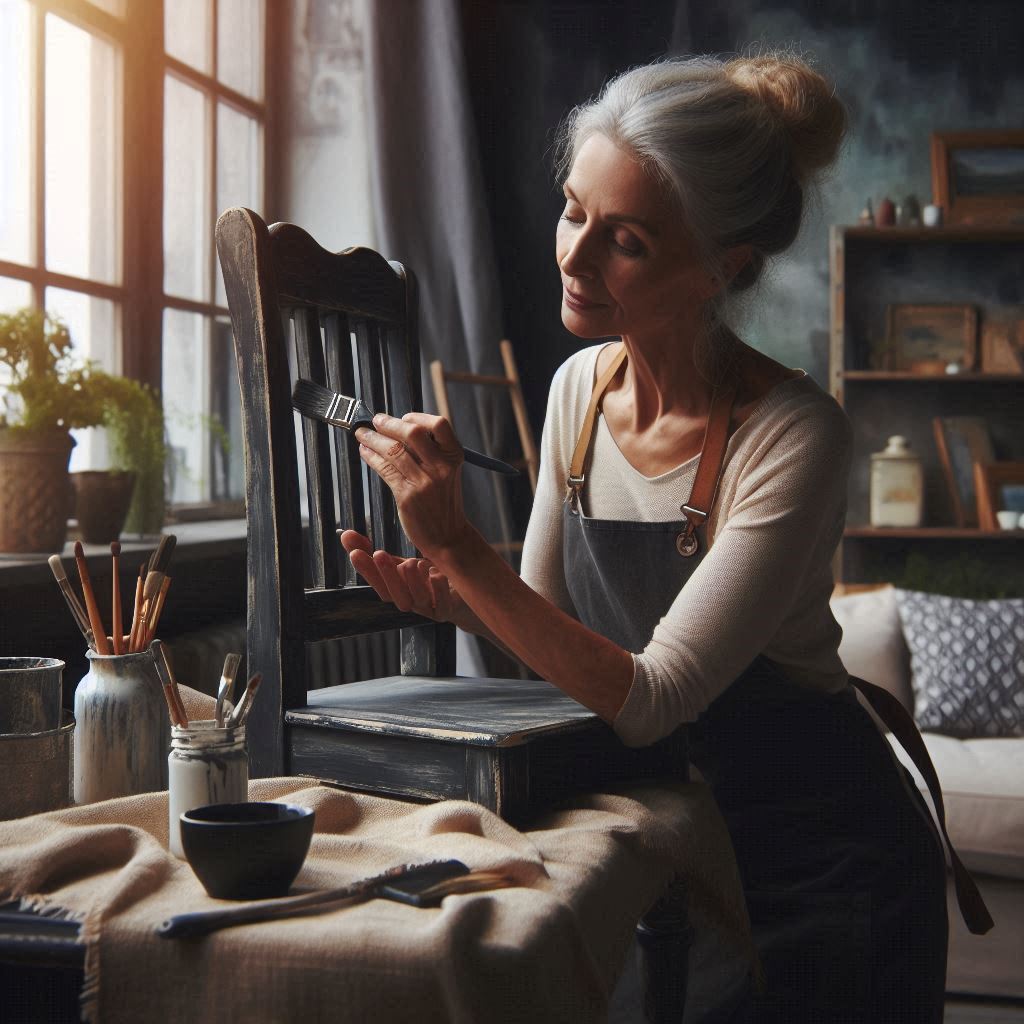
1. Chalk Paint Makeover for Old Chairs
Chalk paint is a DIY favorite because it’s easy to use and requires little prep. Follow these steps to turn old chairs into statement pieces:

- Step 1: Lightly sand the chair to remove any dirt or grease.
- Step 2: Apply a coat of chalk paint (no primer needed!).
- Step 3: Let it dry and apply a second coat if necessary.
- Step 4: Add a protective wax or varnish to seal the paint.
- Optional: Use stencils to add designs to the chair’s back or seat for extra flair.
2. Repurposing an Old Dresser into a Storage Bench
Turn an old dresser into a practical and stylish storage bench with these simple steps:
- Step 1: Remove the drawers from the dresser.
- Step 2: Sand the entire piece to prepare it for painting.
- Step 3: Cut a piece of foam to fit the top of the dresser and cover it with fabric to create a cushion.
- Step 4: Paint or stain the dresser as desired, and add baskets where the drawers once were for extra storage.
3. Reimagine a Coffee Table with a New Finish
Give an old coffee table a new lease on life with just a little sanding and staining:
- Step 1: Sand the surface to remove the old finish.
- Step 2: Apply a wood stain in a shade of your choice.
- Step 3: Finish with a coat of varnish to protect the surface and give it a shiny, new appearance.
4. Turning Wooden Crates into Rustic Shelves
Wooden crates are versatile and affordable, making them perfect for creating unique shelving:
- Step 1: Sand and paint or stain the crates for a rustic or modern look.
- Step 2: Stack them on top of each other or mount them to the wall for a customized shelving unit.
- Step 3: Add decorative accents, books, or plants to complete the look.
5. Upholstering Old Chairs for a Fresh Look
Reupholstering is easier than it sounds and can dramatically transform your furniture:
- Step 1: Remove the old fabric from the chair.
- Step 2: Lay your new fabric over the chair seat and use a staple gun to secure it in place.
- Step 3: Reattach the seat to the chair, and you’ve got a stylish, refreshed piece.
Common Mistakes to Avoid When Upcycling Furniture
Avoiding a few common pitfalls can help ensure your Easy DIY Furniture Upcycling for Beginners projects turn out beautifully. Here are some tips:
Forgetting to protect your finish: Applying a clear coat or varnish will keep your upcycled furniture looking fresh and protected from wear and tear.
Over-sanding: Sanding too much can damage the wood. Lightly sand just enough to smooth out rough areas.
Skipping surface prep: Always clean and sand your furniture before painting or staining. This helps the paint adhere and creates a smoother finish.
Using the wrong type of paint: Not all paints are created equal. Chalk paint is great for beginners, while regular latex paint may require priming.
The Best Places to Find Affordable Furniture for Upcycling
You don’t need to spend a lot of money to find great furniture for upcycling. Here are some of the best places to score affordable pieces:
- Thrift Stores: You’ll find all sorts of hidden gems, from dressers to dining sets. Be sure to check your local stores regularly for new inventory.
- Garage Sales: Many people sell furniture they no longer want at a fraction of the original cost. Don’t be afraid to haggle for a better deal!
- Online Marketplaces: Websites like Facebook Marketplace, Craigslist, and eBay are great for finding inexpensive furniture locally.
- Curbside Finds: Don’t overlook pieces left out on the curb. Many items can be salvaged with a little TLC and creativity.
When searching for furniture to upcycle, look for sturdy pieces with good “bones.” Even if they need some cosmetic work, they’ll hold up well over time.
The Joy of Creating Something Unique and Personal
Upcycling furniture is a rewarding, easy DIY project that brings both creativity and satisfaction. You don’t have to be an expert to transform a piece of old furniture into something beautiful and useful. With a few basic tools and some affordable materials, you can easily tackle projects that add a unique, personal touch to your home.
The best part? The possibilities are endless, and each upcycled piece tells a story—one that reflects your personality, creativity, and resourcefulness.
So why not get started on your own Easy DIY Furniture Upcycling for Beginners project today? You’ll be amazed at what you can accomplish!


[…] Related Article: https://trythisathome.club/easy-diy-furniture-upcycling-projects/ […]