Are you looking for a simple way to add extra storage and style to your home without breaking the bank? Installing DIY floating shelves are a perfect solution! Whether you need a spot to display décor, store essentials, or organize a cluttered area, these shelves are not only affordable but also incredibly gratifying to make. Plus, they provide a minimalist, clean look that works in any room.
In this guide, I’ll walk you through everything you need to know to install your own DIY floating shelves, even if you’re a beginner. With easy-to-find materials and simple steps, this project is both fun and rewarding. Let’s get started!
Table of Contents
Why Install DIY Floating Shelves?
Floating shelves offer more than just storage—they are a great way to enhance the aesthetics of any space. Here’s why they’re a great DIY project:
1. Affordable Storage Solution
Floating shelves are a budget-friendly alternative to bulky furniture pieces like cabinets or bookcases. With just a few materials, you can create your own customized shelves for a fraction of the price of store-bought versions.
2. Personalization and Style
One of the best things about DIY floating shelves is that you can personalize them to fit your home’s style. Whether you want a rustic wood finish, a modern sleek design, or a pop of color, you can tailor the materials and finishes to suit your space.
3. Beginner-Friendly DIY
Even if you’re new to DIY, floating shelves are a perfect project to start with. They require minimal tools and skills but deliver a big impact in your home. This project is both achievable and gratifying, giving you the confidence to tackle more DIY projects in the future.
Materials and Tools You’ll Need
Before diving into the steps, it’s important to gather all the materials and tools you’ll need. These are easily accessible and inexpensive, making this project both convenient and affordable.
Materials:
- Wooden boards (size depending on the space and your preference)
- Floating shelf brackets (for an invisible, clean look)
- Wall anchors and screws (choose heavy-duty ones to support weight)
- Paint or stain (optional for finishing the shelves)
Tools:
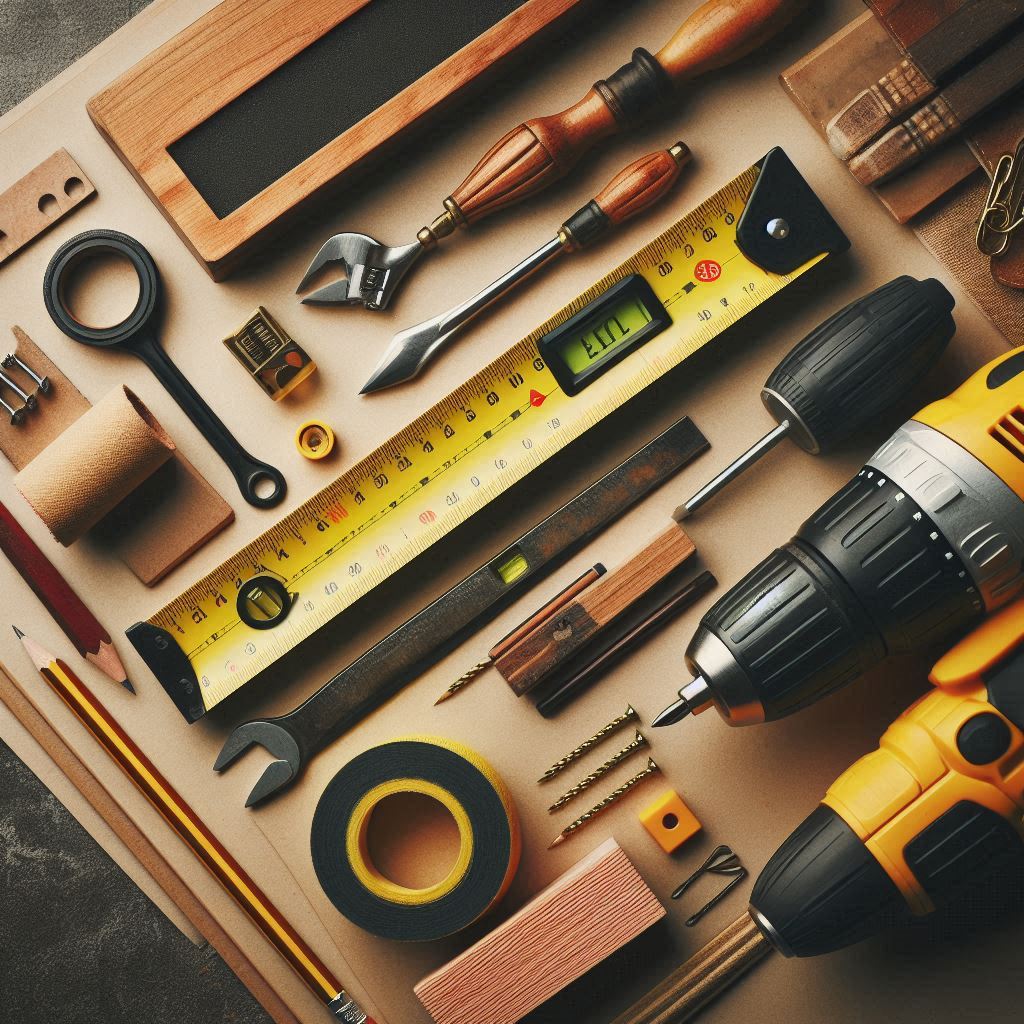
- Measuring tape
- Pencil
- Level
- Drill
- Screwdriver
- Sandpaper (for smoothing the wood if needed)
- Stud finder (to locate wall studs)
Step-by-Step Guide to Installing DIY Floating Shelves
Now that you have everything ready, let’s walk through the installation process step by step. Don’t worry if you’re new to DIY—this project is designed to be simple and fun!
Step 1: Measure and Plan the Space
The first step to a successful installation is proper planning.
- Measure the Wall: Use your measuring tape to measure the area where you want to install the shelves. Make sure you have enough space for the number of shelves you want to install.
- Mark the Placement: Using a pencil, mark where each shelf will be placed. If you’re installing more than one shelf, leave enough vertical space between each shelf for the items you plan to store or display.
- Consider Spacing: For the most balanced look, try to place your shelves at eye level and leave consistent spacing between them. If you’re hanging shelves over a piece of furniture, leave at least 10-12 inches of space between the top of the furniture and the first shelf.
Step 2: Choose and Prepare Your Shelves
Now that your placement is planned, it’s time to prepare the shelves themselves.
- Select the Right Wood: Choose wooden boards that fit the look you’re going for. Pine and oak are popular options for their durability and appearance.
- Cut the Boards (if necessary): If your wooden boards are too long, you can easily cut them down to size with a hand saw or ask for custom cuts at the hardware store.
- Sand the Edges: Lightly sand the edges of the boards to remove any splinters or rough areas.
- Paint or Stain (optional): To customize the look of your shelves, consider painting or staining the wood. Paint adds a pop of color, while a natural wood stain offers a rustic or modern vibe.
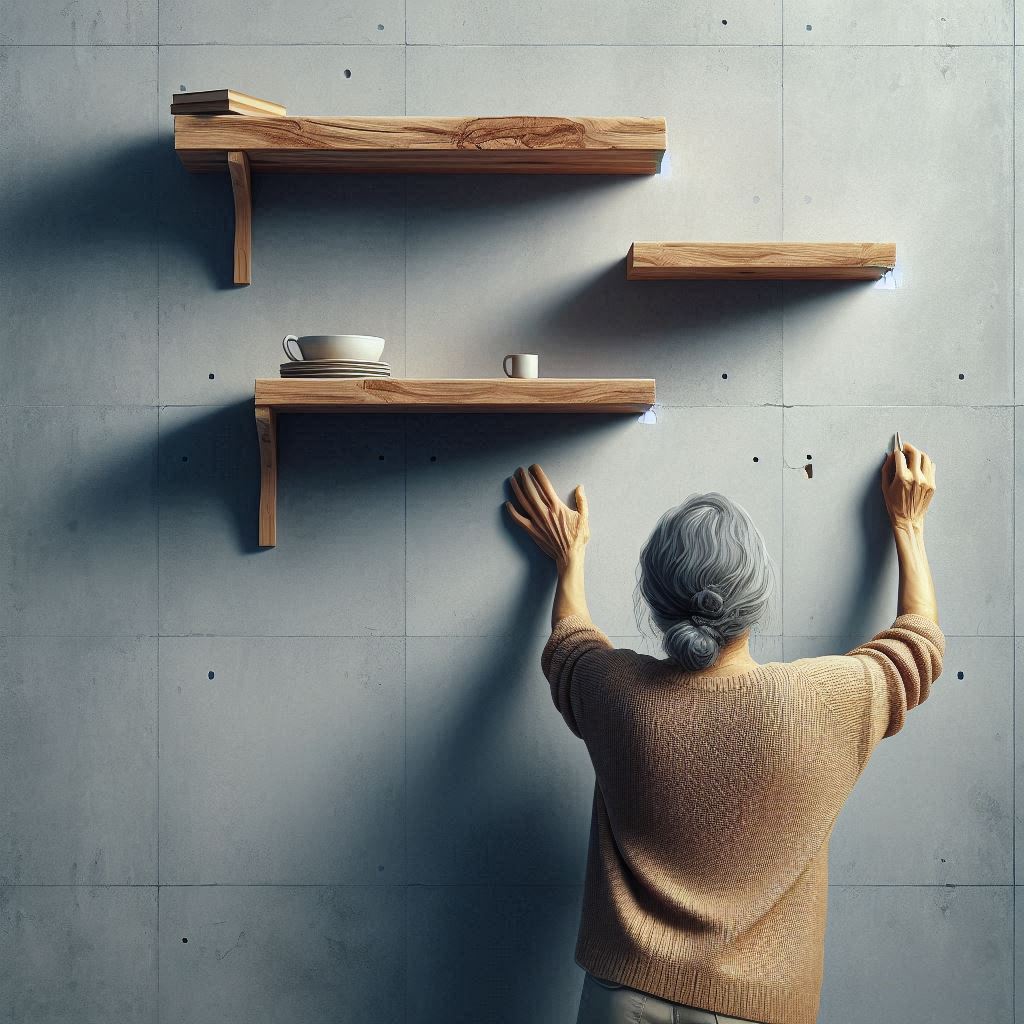
Step 3: Locate Studs and Install Brackets
A key part of installing floating shelves is making sure they’re secure and can hold the weight of the items you plan to display.
- Find Wall Studs: Using a stud finder, locate the studs in the wall where you want to install your shelves. Mark their location with a pencil.
- Install Brackets: Once you’ve marked the studs, hold your brackets against the wall and mark the spots where you’ll need to drill. Use a level to ensure the brackets are straight. Drill pilot holes for the screws, then use your drill or screwdriver to attach the brackets securely to the wall. If you’re not hitting a stud, use heavy-duty wall anchors to ensure stability.
Step 4: Attach the Shelves
With the brackets installed, it’s time to attach your shelves!
- Place the Shelves: Set the wooden boards on top of the brackets, making sure they’re aligned properly.
- Secure the Shelves: If needed, use small screws to attach the boards to the brackets for extra stability. You can also use adhesive strips or glue for a cleaner look if your brackets are invisible.
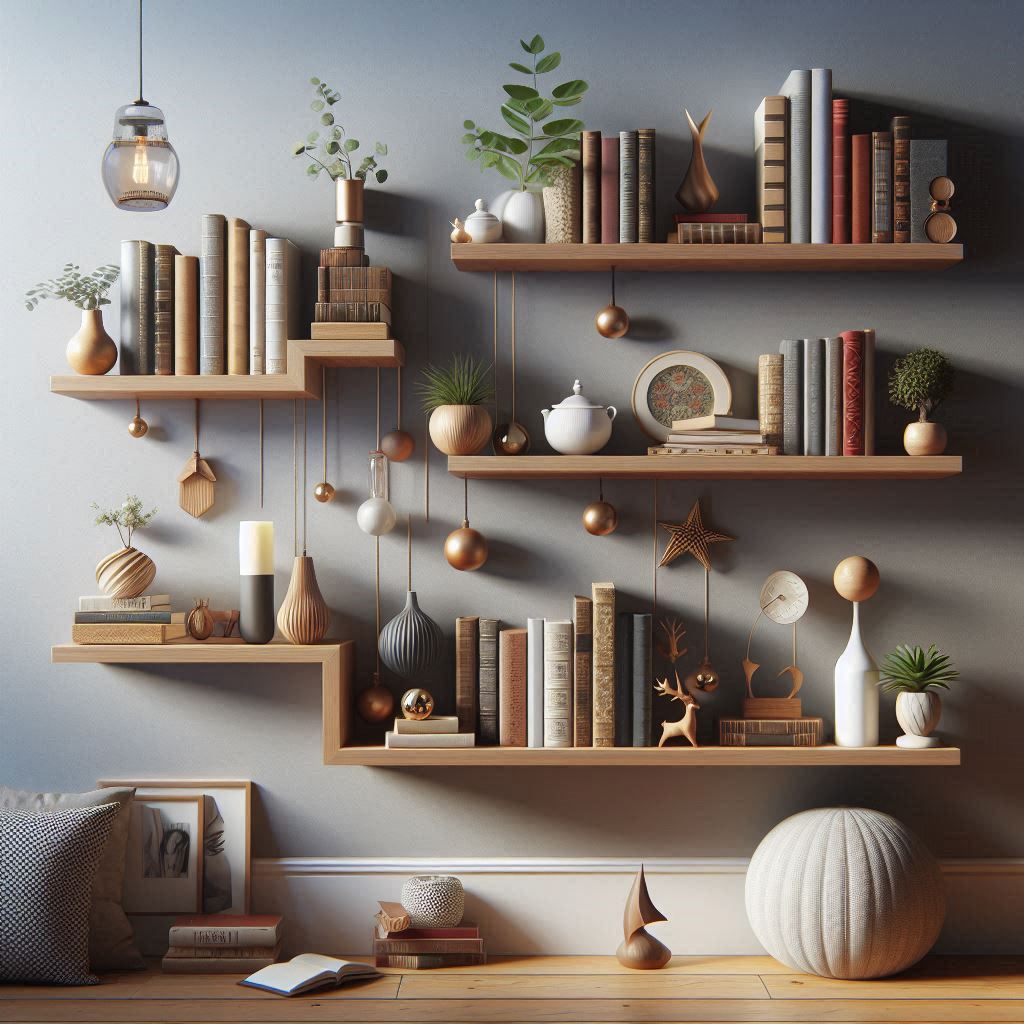
Tips for Styling Your DIY Floating Shelves
Now that your shelves are up, the fun part begins—decorating! Here are some tips to help you style your DIY floating shelves to make them functional and beautiful.
1. Balance Functionality and Aesthetics
Make sure your shelves are both practical and stylish by balancing the items you store. Consider mixing decorative pieces like vases or framed photos with functional items like books or baskets. This keeps the shelves from looking too cluttered or too sparse.
2. Create a Theme
Choose a theme or color palette for the items on your shelves. For example, you could go with a coastal theme, using seashells, candles, and small potted plants. Or, opt for a modern look with minimalist décor in black, white, and metallic tones.
3. Add Personal Touches
Incorporate personal items like family photos, travel souvenirs, or sentimental knick-knacks to make your shelves feel more unique and cozy.
Common Mistakes to Avoid When Installing Floating Shelves
While DIY floating shelves are straightforward, there are a few common mistakes to watch out for.
1. Incorrect Measurements
It’s easy to make measurement mistakes when installing floating shelves, but they can lead to uneven shelves or shelves that don’t fit the space properly. Double-check your measurements before drilling to ensure everything is level and properly aligned.
2. Using the Wrong Anchors or Brackets
Choosing the right hardware is crucial for supporting the weight of the shelves and the items you plan to place on them. Always opt for heavy-duty anchors and brackets to avoid sagging or even the shelves falling off the wall.
3. Overloading the Shelves
It’s tempting to load your new shelves with all your favorite items, but be mindful of their weight capacity. Overloading the shelves can cause them to warp or come loose over time. Stick to lighter items and avoid placing too much weight on them.
Why DIY Floating Shelves are Gratifying
DIY floating shelves aren’t just a functional project—they’re incredibly satisfying to complete. Here’s why you’ll feel a sense of pride once you’ve finished this DIY task:
1. Sense of Accomplishment
There’s nothing like the feeling of creating something useful and beautiful with your own hands. Installing floating shelves is a beginner-friendly project that will give you a huge confidence boost, especially if you’re new to DIY.
2. Personalization
Store-bought shelves can’t match the uniqueness of DIY floating shelves. By choosing the materials, color, and placement, you’re adding a personal touch to your home that reflects your style and taste.
3. Long-Lasting Impact
Floating shelves offer both immediate and long-term benefits. Right after installation, you’ll see how much they elevate the look of your space. Over time, you’ll appreciate the added storage and organization they provide, making your home more functional and organized.
Installing DIY floating shelves is an easy, affordable, and gratifying project that can transform your home in just a few hours. By following this step-by-step guide, you’ll have beautiful, functional shelves that add both storage and style to any room. Whether you’re displaying décor, organizing clutter, or adding storage, floating shelves are a versatile solution for every home.
So grab your tools, pick out your favorite wood, and start building! You’ll be amazed at how much impact DIY floating shelves can make. And don’t forget—once you’re finished, share your results or tips in the comments below to inspire other DIYers.
Looking for an easy-to-install Floating Shelf Kit? Read my Homeforia Rustic Farmhouse Floating Shelves Review
For more beginner-friendly DIY projects, check out other articles on my blog and get ready to tackle your next home improvement adventure!


[…] Got your Homeforia Rustic Farmhouse Floating Shelves? Read our Step-by-Step Guide to Installing DIY Floating Shelves […]
[…] Step-by-Step Guide to Installing DIY Floating Shelves: Easy, Affordable, and Stylish Tags# affordable DIY# beginner DIY projects# bookshelf painting tips# DIY bookshelf# easy DIY projects# furniture painting# home decor# how to paint a bookshelf for beginners […]